Image Search Techniques: How to Actually Find What You’re Looking For
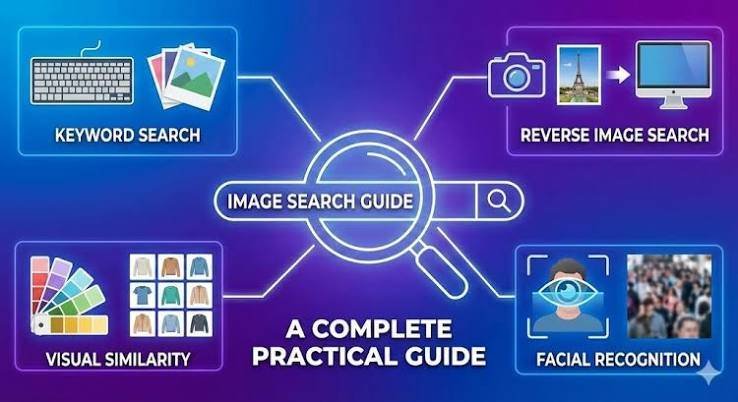
image search techniques
Image Search Techniques: How to Actually Find What You’re Looking For
Okay, so. You’ve got a photo on your phone and no idea where it came from, or you’re trying to find a higher-res version of something you saw on Pinterest three months ago. Sound familiar?
I’ve been there more times than I’d like to admit. And honestly, most people only know one way to search for images: type some words into Google and hope. There’s so much more you can do.
Let me walk you through what actually works.
Reverse Image Search Is Your Best Friend
This is the big one. Reverse image search lets you upload a picture instead of typing words, and the engine finds matches, similar images, or the original source.
Google Images has this built in. Click the camera icon, drop in a photo, done. I use this constantly to figure out if a product photo is stolen, or to track down where a meme actually originated. It’s shockingly good at it, too.
TinEye works a little differently. Instead of showing “similar” results, it’s built specifically to find exact matches and track where an image has been published online. If you’re a photographer trying to catch people using your work without permission, this is the tool.
In my experience, running the same image through both Google and TinEye gives you a fuller picture than either one alone. They index different corners of the web.
Use Specific, Descriptive Keywords
Sounds obvious. Isn’t, really.
A lot of people search “red shoes” and wonder why they get 40 million irrelevant results. Be specific. “Red leather ankle boots women’s” beats “red shoes” every single time.
Think about how an image would actually be captioned or tagged by whoever uploaded it. Photographers, stock sites, news outlets, they all use fairly predictable language. Match that language and your results get dramatically better.
Learn the Filter Options (Nobody Does This)
Google Images has a filter menu most people never click. Size, color, type, usage rights, time. Each one narrows things down fast.
The usage rights filter alone is worth knowing about if you ever need images for a blog, a presentation, or commercial work. Filtering to “Creative Commons licenses” saves you from accidentally using something you shouldn’t.
Color filtering is underrated too. Searching for a “blue vintage car” and then filtering by the exact blue you want? Genuinely useful, and barely anyone bothers.
Try Image Search Operators
Search operators aren’t just for text searches. A few work beautifully with images.
site:pinterest.com sunset photography restricts results to one domain. filetype:png logo design pulls up transparent logos specifically. These little tricks save a stupid amount of time once they’re second nature.
I’ll be honest, I forgot about operators for years. Once I started using them again it felt like discovering a cheat code.
Google Lens Changes Everything
If you haven’t used Google Lens recently, go try it now, seriously.
Point your phone camera at literally anything, a plant, a product, a painting in a museum, handwritten text, and Lens tries to identify it or find matching images online. It’s not perfect. Sometimes it’s wildly wrong about plants, in my experience. But for products, landmarks, and artwork? Scary accurate.
This has basically replaced reverse image search for a lot of casual, on-the-go searching. Snap, search, done.
Don’t Sleep on Stock Photo Sites
Sometimes the image search engines aren’t the right tool at all. If you need a high-quality, properly licensed photo, go straight to the source.
Unsplash and Pexels have genuinely excellent free libraries. Their internal search is often more precise for “stock photo” style needs than a general web search, because every image is tagged consistently by professionals, not randomly across the whole internet.
A Quick Word on Accuracy
Here’s something worth sitting with for a second. Not every match a reverse search gives you is the original source. Images get copied, re-uploaded, watermarked over, cropped. The oldest-looking result isn’t automatically the real one either.
If authenticity actually matters, say you’re fact-checking a viral photo, cross-reference a few sources. Check metadata if you can access it. Look at who published it first and whether that account has a track record. One match isn’t proof of anything on its own.
Putting It All Together
Here’s what I’d actually recommend, same advice I’d give a student or a coworker asking me this exact question:
- Start with reverse image search (Google Images or TinEye) if you already have a photo and need its source.
- Use specific, caption-style keywords rather than vague ones when searching from scratch.
- Filter by usage rights before using anything you find for real projects, commercial or otherwise.
- Try Google Lens for real-world objects, products, and quick identification on mobile.
- Go to dedicated stock sites when you need clean, licensed, high-quality images rather than whatever the open web serves up.
- Cross-check sources before trusting any single result as the “original.”
The Bottom Line
Image search isn’t just typing a word and scrolling, not anymore. Between reverse search, filters, operators, and tools like Lens, there’s a genuinely different and faster way to find what you need. It takes maybe ten minutes to get comfortable with these techniques. After that? You’ll never go back to the old way of just guessing keywords and hoping for the best.
Useful links:
About The Author